The Myndbend Process Manager currently has one Email Template (Myndbend administration app, Email Template). However, you may differentiate the content within the template based on forms, fields, etc. To do this we'll create a Zendesk Macro and use that macro in the Email Template. When the Email is sent, it will include the appropriate content from the macro.
- Create a new Macro in Zendesk.
- The macro name can be anything you'd like to indicate that the macro will be used by an API rather than a user.
- "Available for" can be one of your agent groups. To avoid confusing customer service agents, you can also login to Zendesk using the admin account that's used by the Myndbend process manager (see API Access page in Myndbend app) and create the macro to only be accessible by that user.
- Action should be set to "Comment/Description"
- The macro description should be the text that you will want to place into the approval request emails sent by Myndbend
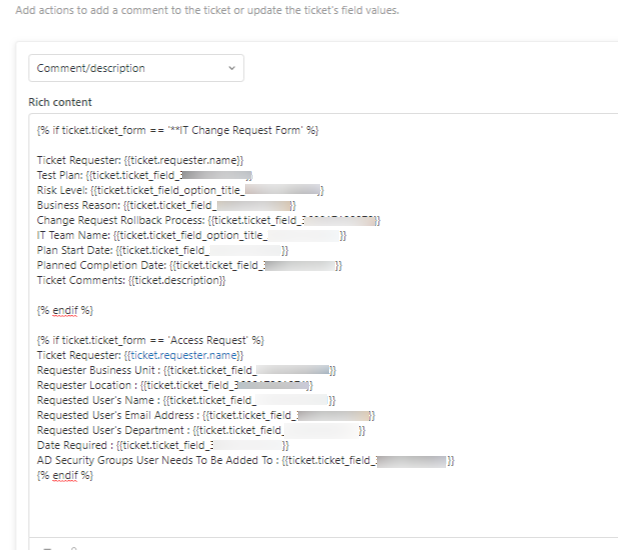
The macro can contain Zendesk placeholders. The "If logic" to differentiate the text in the macro uses Liquid Scripting, referenced here.
- The example above uses a form value to differentiate the text to display in the approval email. You may also use a field in the "if statement" like so:
{%if ticket.ticket_field_123456789 == 'Something' %}Tip: The macro can be debugged by applying it to a test ticket. For example, you can change the test ticket to have the values necessary to satisfy the macro's conditions. When you "Apply" the macro to the test ticket, you'll see the correct content get applied to the comment field.
Your custom text and placeholders
{% endif %}
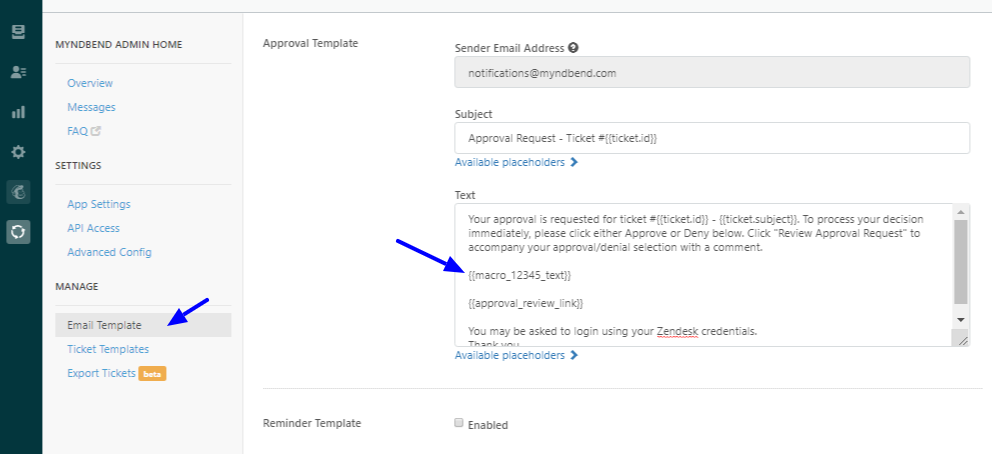
- Once the Macro is created, you will need to obtain the macro's ID from the Macro's edit URL. From the macro list in Zendesk, click the macro you've just created. Grab the number from the URL. For example, you'll copy 12345 from "https://yourdomain.zendesk.com/agent/admin/macros/12345"
- Go to the Myndbend administration app, then "Email Template". In the body of the Email template, you'll insert the macro like so {{macro_<ID>_text}}. The <ID> needs to be replaced with the ID you've obtained from step 2.
- Add an approver to a test ticket and confirm the email contains the placeholder content you've specified in the macro.
- If it does not include any text, make sure the macro placeholder in the Email Template is correct.
- If the macro is correct but still does not show content from the macro, you may have "if logic" or placeholders that do not match the ticket's values. Use the debugging tip in step 1 to confirm all values are present.